

Line Art (C) Rooen
Coloring & Tutorial (C) me
Medium: Photoshop
This is part two of the coloring tutorial.
Part one can be found here
Final result can be found here
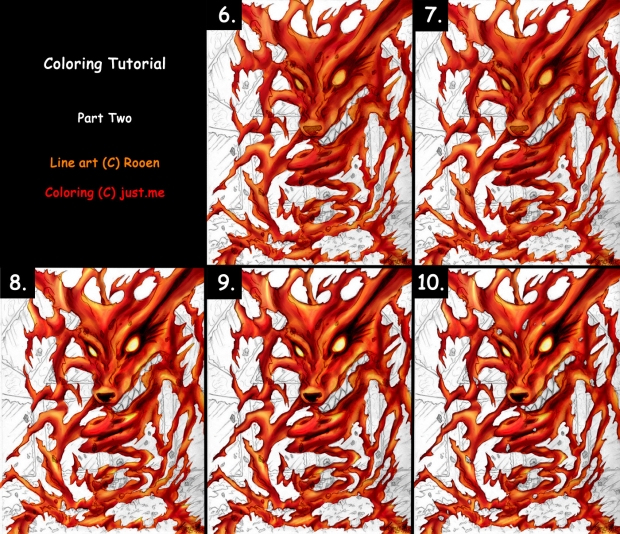
View High Resolution to see everything clearly! ;P As you can see, there are numbers in the corner, indicating the step. Here is some explanation of what I have done:
6.
- Go over your drawing again and adjust the coloring where you seem fit. I have used all the colors again: yellow, orange, red, dark red and a very dark red.
- Vary your brush sizes where needed, otherwise you'll overlap too much of the lighter shade.
7.
- Use a burn tool to emphasize the darker areas. Be careful not to use it too much, otherwise it will look unreal.
- Burn tool settings: exposure around 16%, range: midtones.
8.
- Use the dodge tool to highlight the lighter spots. Be careful using the dodge tool as well - don't use it too much. It will make it unreal as well.
- Dodge tool settings: exposure 23%, range: highlights.
- Smudge where the dodge tool is too dominant (in your opinion). Do not smudge too much or you'll mess up the coloring you did earlier ;P
- Note: I used the dodge tool for the eyes as well, to give them a fierce look. I also used the burn tool to darken the eye lines (I forgot to do that earlier :P)
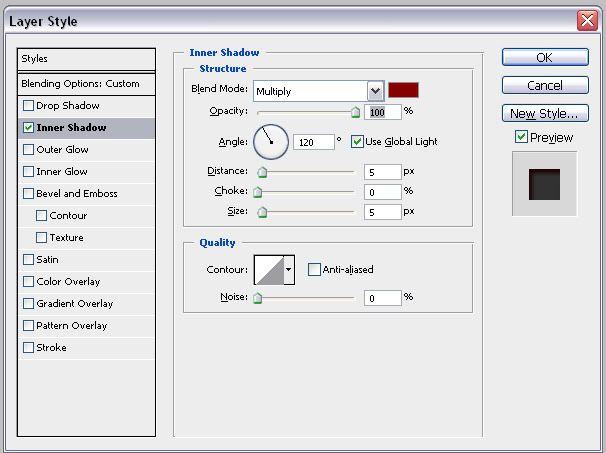
9. I still wasn't very satisfied with the outcome so I have experimented a bit:
- Menu --> layer --> layer style --> inner shadow
- Settings: Click here to see the settings The color is the darkest color I used to shade: very dark red.
10. The final thing is cleaning.
- Unlock your coloring layer and start erasing unwanted colored places (e.g: outside of the kyuubi lines)
- Use the clone stamp tool for small areas you have forgotten to color. Smudge that a little to make it nice and neat.
And now you have colored your drawing! :P Don't be afraid to color or do things wrong and try and pay attention to smaller details as well ^^ I hope this tutorial was useful for you! ^^


